Hello! Welcome to Erica's Craft Room
100 Cricut Cartridge Blog Hop Day Two
If you stopped by from your dashboard please start here at http://mycricutcraftroom.blogspot.com/ so you don't miss out on any of the fun projects!


Each of our projects will have pink somewhere even if it's on the back or covered up. This month each of the design team members had to choose 4 Cricut cartridges to use. I chose~
1. Storybook
2. Mini Monsters
3. Happy Hauntings
4. Create a Critter
Onward...to the projects..

This month I have used the heck out of my Storybook Cricut cartridge! My good friend was getting married and I couldn't wait to help!


I started with the wine list, she asked for a full size sheet that would be placed in a frame at the wine table. I cut a sheet of kraft board to size then cut a fancy shape with the "fit to page" function on the Cricut from a sheet of cream colored card stock. She also wanted matching Reserved table signs which I cut to be a 4x6 size.


The table seating cards, food labels, beverage labels, and blank tags were cut to a 2x4" size.
Then the challenge of writing everything took place. :)


For her shower gift I told her I would like to make her "Thank You" cards. (because I really had no idea what to get them! LOL)
So I again used my Storybook cartridge and made simple but matching cards for her to send to all of her guests..this pic only shows 48 of them..there is another stack of 48 being made now..they are a little time consuming because the wording is so delicate, but she is worth it!
Now on to the next project!..

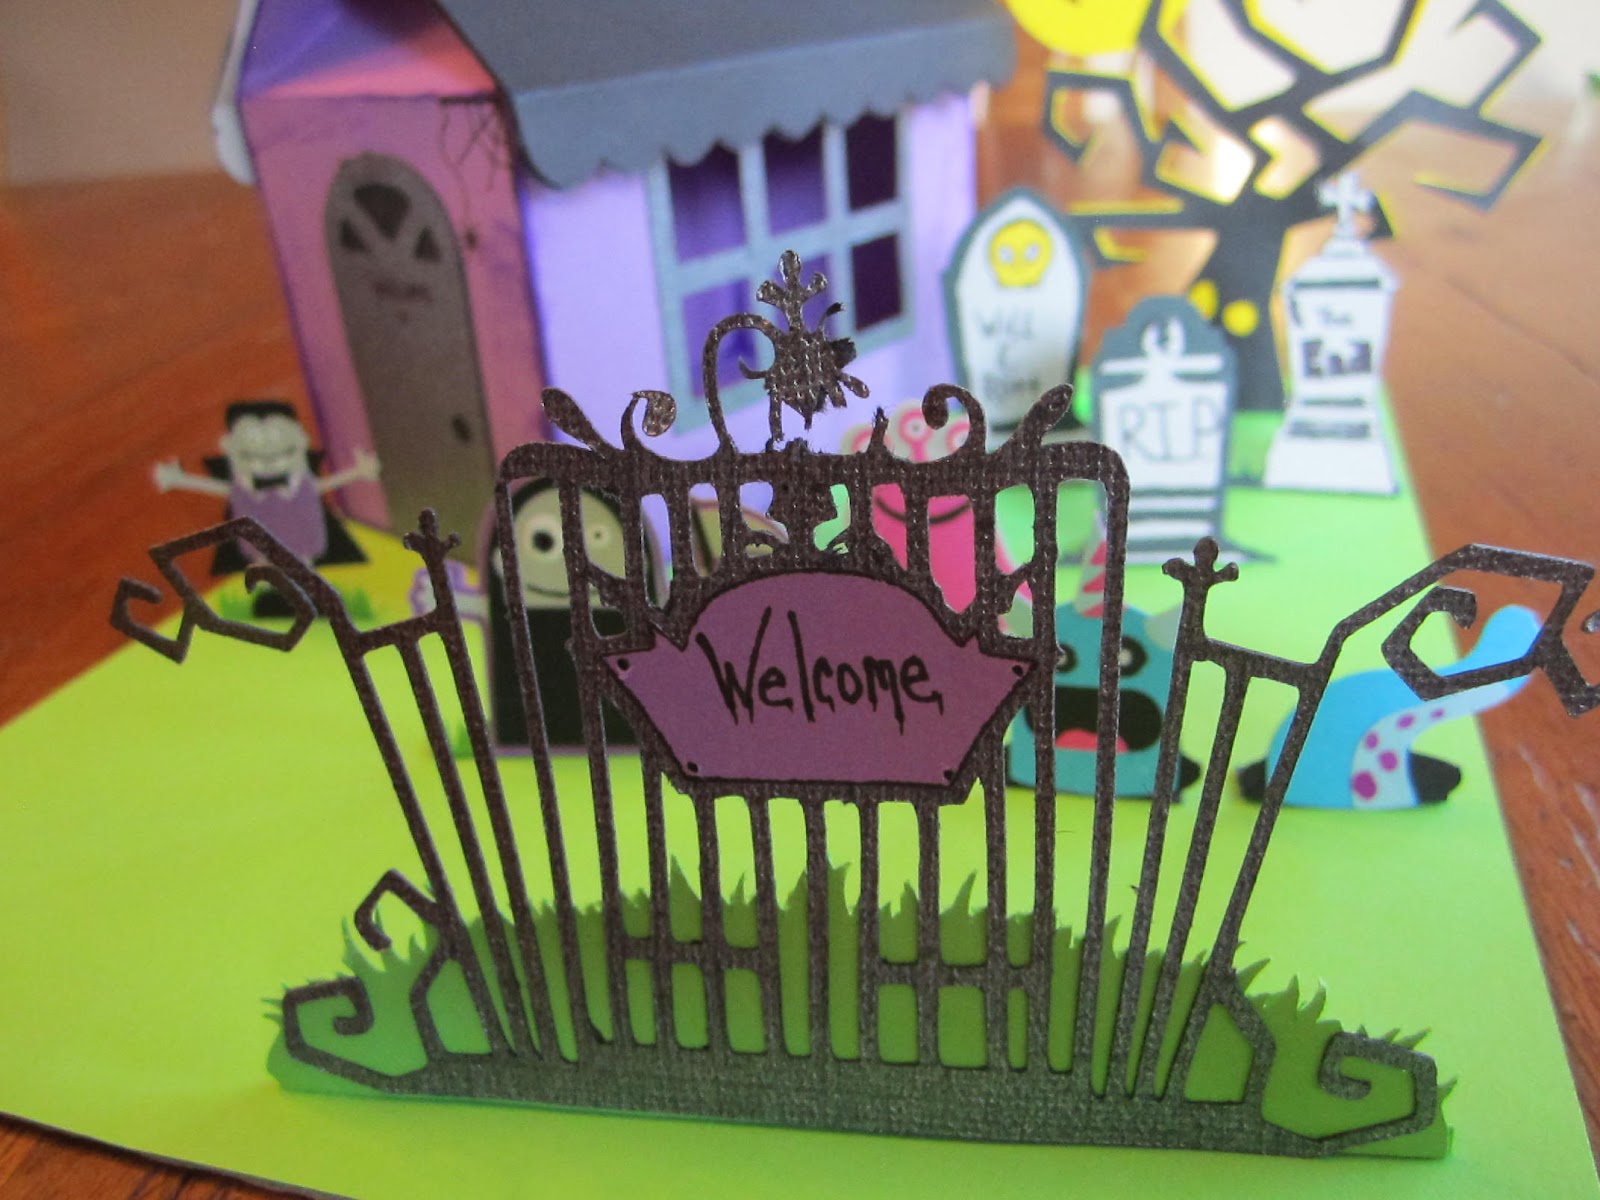
I love, love,love dimensional cards. So I decided to give a Center Step (or step ladder) card a try. I wanted to make it look like you were standing at the end of a giant mansions lane. I used the Happy Hauntings cartridge for the Trees, House and Tombstones. But I knew it needed more so I added a fence from Mini Monsters.

Side view so you can see the individual steps

A top view so you can more easily see the tombstones, those darn trees do a great job of keeping the place hidden! :)
OOOHH...lets move on to the next spooky card..shall we? Muahahaha!

This card is again something new to me..and as always I love making cards that do something, or look different that the traditional card.
The trees and tombstone were made using the Mini Monsters cartridge. The grass is cut by hand.
It looks fun enough as it sits..right?
But if you pull the little tab at the top...

BOO! A scary little ghosty pops out from behind the tombstone! Hope I didn't scare you too much! LOL
I added the spiders and ghost from the Happy Hauntings cartridge.

And now onto something a little more simple but still fun and cute!
I wanted to make something a little more simple than the other cards I have been making, but I still wanted it to be fun and different.

That's when I decided on a happy pumpkin ..


Telescoping card!
Isn't this adorable?!!
I cut the pumpkins using the Create a Critter cartridge at
2 1/4", 3", and 3 3/4". I used a shimmer orange card stock and a very dark brown card stock for the backing.
*BONUS PROJECTS*
I know this post is long but I wanted to share with you some pictures of the Halloween projects I made last year.


Quad Easel card using plastic spiders and flies as props

Side Step Card using Happy Hauntings
I hope you had a good time checking out all of my projects..be sure to check out the rest of my blog to see what else you have missed out on.
Now be sure to hop on over and check out
JODI!!
Here is todays line up in case you get lost:
1. MCCR http://
2. Jamie L http://
3. Ashley http://
4. Marji www.fstampaholic.blogspot.com
5. Miranda http://www.nanasscrapspot.com/
6. Sarah http://
7. Melissa http://
8. Sharon http://
9. Erica's Projects http://
10. Jamie M http://
11. Amy http://
12. Jodi http://
13. Tess www.sassycricutcrafting.com
14. Christina http://cema1cema.blogspot.com/
15. Jessica W www.craftinandstampin.blogspot
16. Blog Candy http://
2. Jamie L http://
3. Ashley http://
4. Marji www.fstampaholic.blogspot.com
5. Miranda http://www.nanasscrapspot.com/
6. Sarah http://
7. Melissa http://
8. Sharon http://
9. Erica's Projects http://
10. Jamie M http://
11. Amy http://
12. Jodi http://
13. Tess www.sassycricutcrafting.com
14. Christina http://cema1cema.blogspot.com/
15. Jessica W www.craftinandstampin.blogspot
16. Blog Candy http://