Showing posts with label Create a Critter. Show all posts

Sunday, October 7, 2012

October 100 Cricut Cartridge Blog Hop


Hello! Welcome to Erica's Craft Room
100 Cricut Cartridge Blog Hop Day Two

If you stopped by from your dashboard please start here at http://mycricutcraftroom.blogspot.com/ so you don't miss out on any of the fun projects!


Collectively the design team uses over 100 different Cricut Cartridges in their projects during the two days of this hop! There is so much talent and inspiration and PRIZES!! Erica is giving away 3 different prizes to 3 separate winners this month! One prize will be TPC Girlfriends pink papers,  one will be the Pink Journey Cricut cartridge,  and one will be a pink little cricut toy. Oh did I mention, we are going pink for breast cancer awareness this month?

 
Each of our projects will have pink somewhere even if it's on the back or covered up. This month each of the design team members had to choose 4 Cricut cartridges to use. I chose~
1. Storybook
2. Mini Monsters
3. Happy Hauntings
4. Create a Critter

Onward...to the projects.. 

This month I have used the heck out of my Storybook Cricut cartridge! My good friend was getting married and I couldn't wait to help!


I started with the wine list, she asked for a full size sheet that would be placed in a frame at the wine table. I cut a sheet of kraft board to size then cut a fancy shape with the "fit to page" function on the Cricut from a sheet of cream colored card stock. She also wanted matching Reserved table signs which I cut to be a 4x6 size.


 The table seating cards, food labels, beverage labels, and blank tags were cut to a 2x4" size.
Then the challenge of writing everything took place. :)


For her shower gift I told her I would like to make her "Thank You" cards. (because I really had no idea what to get them! LOL)
So I again used my Storybook cartridge and made simple but matching cards for her to send to all of her guests..this pic only shows 48 of them..there is another stack of 48 being made now..they are a little time consuming because the wording is so delicate, but she is worth it!
Now on to the next project!..


I love, love,love dimensional cards. So I decided to give a Center Step (or step ladder) card a try. I wanted to make it look like you were standing at the end of a giant mansions lane. I used the Happy Hauntings cartridge for the Trees, House and Tombstones. But I knew it needed more so I added a fence from Mini Monsters.


Side view so you can see the individual steps

A top view so you can more easily see the tombstones, those darn trees do a great job of keeping the place hidden! :)

OOOHH...lets move on to the next spooky card..shall we? Muahahaha!


This card is again something new to me..and as always I love making cards that do something, or look different that the traditional card.
The trees and tombstone were made using the Mini Monsters cartridge. The grass is cut by hand.
It looks fun enough as it sits..right?
But if you pull the little tab at the top...

BOO!  A scary little ghosty pops out from behind the tombstone! Hope I didn't scare you too much! LOL
 I added the spiders and ghost from the Happy Hauntings cartridge.


And now onto something a little more simple but still fun and cute!
I wanted to make something a little more simple than the other cards I have been making, but I still wanted it to be fun and different.


That's when I decided on a happy pumpkin ..


Telescoping card!
Isn't this adorable?!!
I cut the pumpkins using the Create a Critter cartridge at
2 1/4", 3", and 3 3/4". I used a shimmer orange card stock and a very dark brown card stock for the backing.

*BONUS PROJECTS*

I know this post is long but I wanted to share with you some pictures of the Halloween projects I made last year.


Quad Easel card using plastic spiders and flies as props

Side Step Card using Happy Hauntings

I hope you had a good time checking out all of my projects..be sure to check out the rest of my blog to see what else you have missed out on.
Now be sure to hop on over and check out
JODI!!


Here is todays line up in case you get lost:

Friday, August 3, 2012

August 100 Cricut Cartridge Blog Hop

 
Welcome to Erica's Craft Room
100 Cricut Cartridge Blog Hop Day One
You should have started at http://mycricutcraftroom.blogspot.com/ if not please start at the beginning.

Welcome to My Cricut Craft Room's August 100 Cartridge Blog Hop

Collectively the design team uses over 100 different Cricut Cartridges in their projects during the two days of this hop.
 What an exciting weekend!!

As special treat enjoy 10% off of your total purchase with Erica's Craft Room Store.
Use the code AUGUST to see 10% off of your total purchase (No exclusions)


I have made a few projects to share with you today, so lets go check them out..

My first project was done using the Robotz and Indie Art Cricut Cartridges.
Obviously my fingers are not included in the card, but I couldn't get the lil booger to stay closed long enough for its picture! He was just bursting with excitement for his big debut! LOL


I opted to make a dimensional card that I learned how to make from a pin I found on pinterest. I wanted something that can stand and be displayed on its own, but not necessarily an easel card.


The robot is cut at 5 1/2" and the large gear was cut from the Indie Art cart at 6 1/2". the smaller gear that is directly under the robot was cut at 4 1/2".

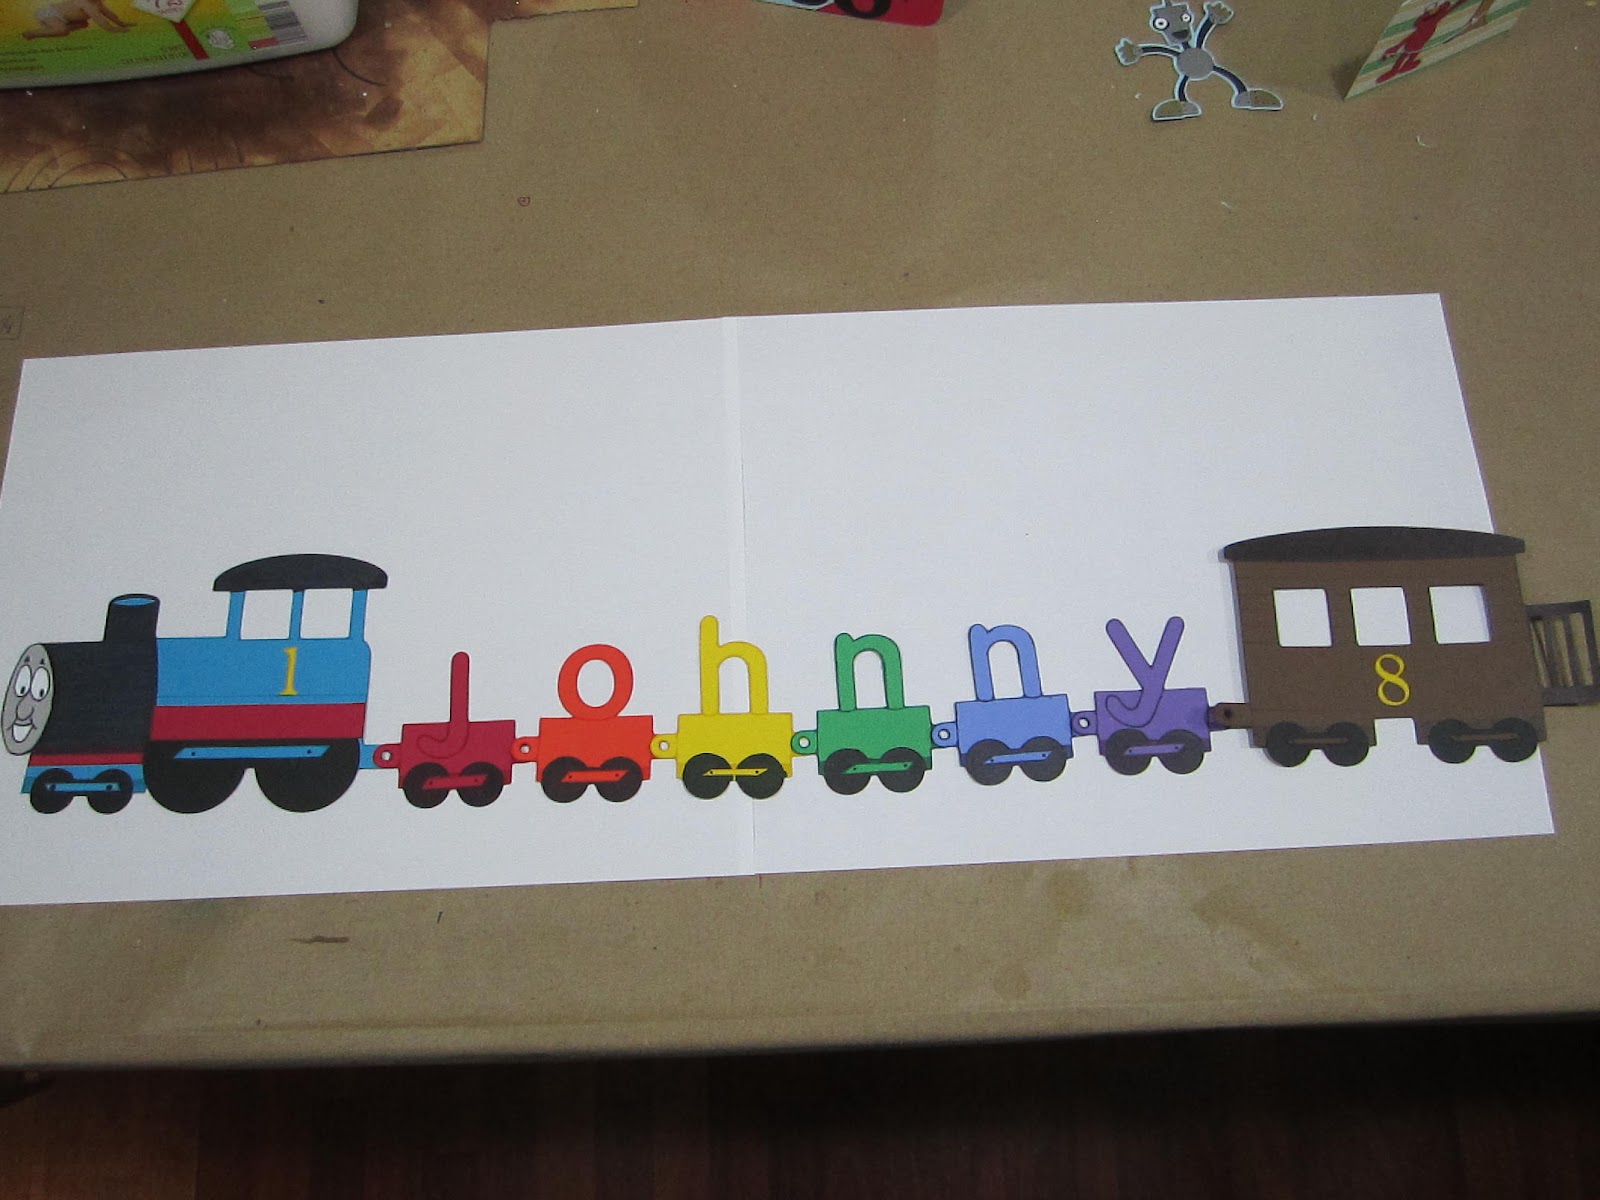
I made my next project using Word Builders; A Word Party. I made this for my 2 year old nephew, we are going to frame it and hang it in his room.


What a cute cartridge! I have had this one for awhile , but never used it! Boy was I missing out! Look how cute this is!!
Everything was cut at 5".


I altered the train by taking off the cow pusher.( because we all know Thomas doesn't have a cow pusher! LOL)
This cartridge does not have many "layers" so I made my own :)
 And, (although I think it would be a great idea for a cartridge,HINT, HINT)  I drew my own "Thomas" face. Its not perfect, but Johnny doesn't care! LOL


Notice how his name is long enough to use all of the rainbow colors?
So this project is becoming a multiple learning tool too!


Now, notice something else? Thomas is #1 and the Caboose is #8..now he can learn to recognize his letters, name, colors and numbers!! (I will be adding the remaining numbers to the letter cars, and brads in between everything to hold it together at a later date to finish the project)
DANG! I am a great Aunt! LOL

All of the black that you see on the project is actually a marker. My intention was to laminate all of these and let him play with them, and didn't want all of the extra bulk, but Thomas turned out so well that we decided to frame it...don't worry I will make him one to play with too! :)

Onward to the next project..shall we?..

I made a card using Elmos Party and Create a Critter Cricut cartridges.
I was in a mood to make a landscaped card. I am not sure if that is its official name, but it is what I call it. And I wanted to be able to use the cartridge for something other than a kids party, so I challenged myself to think outside the box and try something new..again!


Who doesn't love watching Elmo fly his kite in the park?!!


Elmo was cut at 2" using the Elmos Party cartridge and the trees and sun were cut at multiple sizes from the Create a Critter cartridge.
I love this card..it is simple but complicated.


Bonus Project!!

I made an extra project, a fun card (and matching envelope of course) for my not so little anymore cousin graduating from Luther college..and yep I used the Elmos Party! ( I told you I wanted to use the cartridge for something other than a kids party!)


All of the notes were cut at various sizes.

I embossed the music notes with my cuttlebug folder, I also hand embossed all of the raised notes on the card and envelope with my ScrapBoss embossing tools.


He is a very talented young man and although he sings more than plays piano, I will always remember him astonishing us while playing on Nanas piano at such a young age. He has an amazing future to look forward to and we are so proud of him.

I hope you enjoyed my very long blog today. Now its time for you to hop on over to


If you get lost along the way, here is the line up..
MCCR http://
mycricutcraftroom.blogspot.com/ jenn lorist http://
www.jennspapercrafts.blogspot.com/
Teresa http://
www.createenjoyshare.blogspot.com/
Kathy http://
3spoileddogs.blogspot.com/
shelley http://
shelley-scrapbookingforfun.blogspot.com/
heather http://
heathernovinger.blogspot.com/
Jessica S http://
jessicascraftshaque.blogspot.com/
Tammy - http://
www.Cuttinandstampin.blogspot.com/
Jen L http://
www.mybusycraftylife.blogspot.com/
Erica's Projects http://
ericasprojects.blogspot.com/
Samantha http://
www.samanthascricutcreations.blogspot.com/
robin http://
create-a-latte.blogspot.com/
amy http://
clayfulimagination.blogspot.com/
Miranda http://www.nanasscrapspot.com/
Angie http://
crazyscraplady-angelpie.blogspot.com/
LB http://
www.coolbeansbylb.blogspot.com/
Cathy http://
cathyplus5.blogspot.com/
Claire http://
threewaterscreations.blogspot.com/
Lisa Carrier http://
ourcraftingcorner.blogspot.com/
Blog Candy http://
ericasblogcandy.blogspot.com/